Production data that has been captured and can be approved, will be presented within Data Management grids on an approval tab. There will be a tab for each data management item listed for the approval page and there may be an approval page for each module.
Once an approval status has been assigned it cannot be removed and can only be changed to another approval status. Every time an approval status is assigned to a production record an entry is made in the Approvals History table.
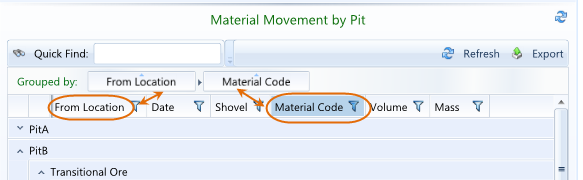
In the above approval page example the Load - Approval data management query has been displayed with a date filter. The page also contains a tab for the Haul - Approval data management query.
Filtering, Grouping and Sorting can be used to narrow down the number of records displayed.
Only column values highlighted with a yellow background can be adjusted.
The table below lists the production tables that the approval folders have been added to.
| Module | Table |
|---|---|
|
Drill and Blast |
|
|
|
Hole Parameters |
|
|
Hole Positions |
|
|
Drill Production |
|
|
DH Blast Consumables |
|
|
DH Blast Explosives |
|
|
Drill Summary |
|
|
Blast Summary |
|
Material Movements |
|
|
|
Load & Haul |
|
|
Surface Mining |
|
|
Processing |
|
Ancillary |
|
|
|
Water Management |
|
Equipment Analysis |
|
|
|
Engine Hours |
|
|
Equipment States |
Note: A new Approved folder has been added to the above tables in Query Builder and has been placed beneath the Audit folder.
The Approved statuses for each production table can be accessed in Query Builder.
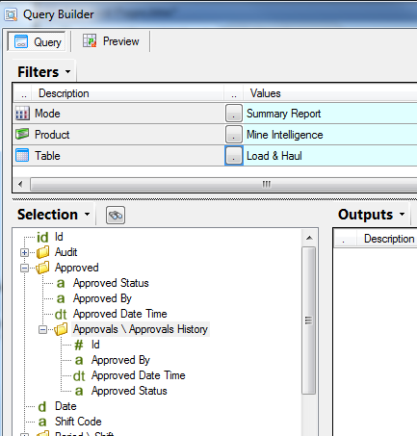
In the above example the Approved folder for the Load table has been displayed. There is a link to the Approvals History folder from the Approved folder. There is a separate Approved folder for the Haul table.
The table below details the approval fields.
| Approved Fields | Description |
|---|---|
|
Approved |
|
|
Approved Status |
The currently assigned approval status. Note: An empty approval status indicates that the record has not been approved yet |
|
Approved By |
The user who set the last approval status. |
|
Approved Date Time |
The date and time of the last approval status. |
|
Approvals History |
|
|
Id |
The unique id of the approvals history record. Note: There will be an approvals history record for each approval. For example if data is rejected on the 28th and then approved on the 30th there will be two approval history records containing the date and time, and the user who set the status for the data. One when the approvals record was rejected and the second when the rejected record was approved. |
|
Approved By |
The user who assigned the status to this approvals history record. |
|
Approved Date Time |
The date and time the status was applied to this approvals history record. |
|
Approved Status |
The approval status assigned to this approvals history record. |
The following features can be used for Data Management Approvals:
| Action | Description |
|---|---|
|
Approval Tabs |
|
|
Load - Approval |
The name of one of the data management queries mapped to the DataManagementItems field on an Approvals page type. Note: There will be one tab for each data management query mapped. |
|
Filter Panel (optional and may contain a number of different filters). |
|
|
|
Select the Hide Filters button to collapse the Filters panel. |
|
|
Select the Hide Filters button to expand the Filters panel. |
|
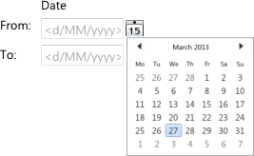
|
Enter a valid date or use the calendar drop down to display the calendar to select required date. |
|
|
Select the Submit button to refresh the data for the selected filter values. Will need to be used to reflect any changes to the filter values. |
|
Toolbar |
|
|
|
Use the Quick Find field to locate required records whilst you type. Refer to the Quick Find section for more information on how to quickly locate records. |
|
|
Click the already selected (default) Approval status to set all currently selected records to that status. |
|
|
Click the drop down arrow to expand the Approval lookup, then select an option to be applied to all currently selected records and to set the default approval status. |
|
|
Use the Cancel button to cancel any editing of records. |
|
|
Use the Save button to save any changes. Note: The Save button must be selected to save changes. |
|
|
Use the Refresh button to refresh the data with any changes made to the data using the existing filters. Note: The Save button must be selected to save changes prior to selecting the Refresh button. |
|
|
Select the drop down arrow to see a list of toolbar options that are currently not visible. This occurs when the width of the grid is reduced. |
|
Grouped By |
|
|
|
Place column headers here to group the records by the column values. Refer to the Grouping section for more information on how to group records by a column. |
|
|
The Status and Period Code column headers have been moved to group by Period Code within Status. |
|
Headers |
|
|
|
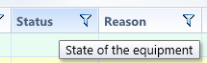
A tooltip containing a description for the field will be displayed when you hover over a column header. Note: This tooltip can be used to provide meaningful information on the fields. |
|
|
Columns can be moved by dragging the column header to another spot in the headers row. |
|
|
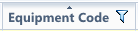
To Filter data select the Filter icon to the right of the column you wish to filter on, to display the Filter options. Refer to the Filtering section for more information on how to filter records. |
|
|
Click on the header to sort in alphabetic order. Refer to the Sorting section for more information on how to sort records. |
|
|
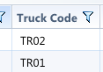
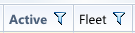
Mandatory fields require a value to be entered and are identified by their column headers with a bold font. In the example to the left the Active field is mandatory whilst the Fleet field is optional. |
|
Copy |
Use the Copy option to copy the contents of selected cells within a single row by right clicking on a cell within the row and selecting the option. The copied values will then be available to paste into the same cells of other rows where any cells have been selected. Note: This option is only available when cells from a single row have been selected. |
|
Paste |
Use the Paste option to copy values from the clipboard and paste to the same cells (fields) in the rows of any selected cells by right clicking and selecting the option. Note: This option will only be enabled when values have been copied. |
|
Approved Status, Date, Shift Code, Source Code, Material Code, Loaded By, etc. |
The Right Click context option displays the fields available for the selected data management query that may be changed. For the Load - Approval data management query the Approval Status, Date, Shift Code, Source Code, Material Code & Loaded By are some of the fields that may be changed using the Right Click menu option to select the field that you would like to change. Note: It is possible to apply the change value of a field to several selected rows. |
|
Status bar |
|
|
|
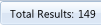
A count of the total number of records extracted for the selected filter values. |
|
|
A count of the number of records being displayed after column filtering has been applied. |
|
|
Time taken to extract the results. |
|
|
Displays the sum, count, average, minimum and maximum values for any highlighted numeric fields. |
|
Keyboard Keys |
|
|
Tab |
Select the Tab key to move from field to field across the grid and to the next record. |
|
Esc |
Press the Esc key once to cancel the editing of a field. |
|
Fields |
|
|
Data Entry |
Whilst typing a value into a field, a lookup of existing values will be filtered down, allowing you to select one of the values as an alternative to typing the full value, or you can press the Tab key to automatically select the 1st value from the lookup as you move to the next field. Note: This only occurs on text fields. |
|
Read Only |
Non highlighted fields are read only and cannot be adjusted.
|
|
Editable |
Only fields highlighted with a yellow background can be adjusted.
|
|
Validation |
Field validation will occur when you save the approval changes. Refer to the Data Management Validation topic for more validation information. |
|
Lookups |
All text fields will contain a lookup of existing values.
|

To Filter data select the Filter icon to the right of the column you wish to filter on to display the Filter options. From where there are various ways to filter the data on.
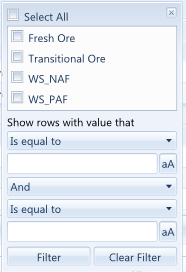
The data will be filtered as you select the required filter values and the column header will be highlighted blue.
Note: The column header is not highlighted when filtering is applied to the General Locations and Mining Locations grids.
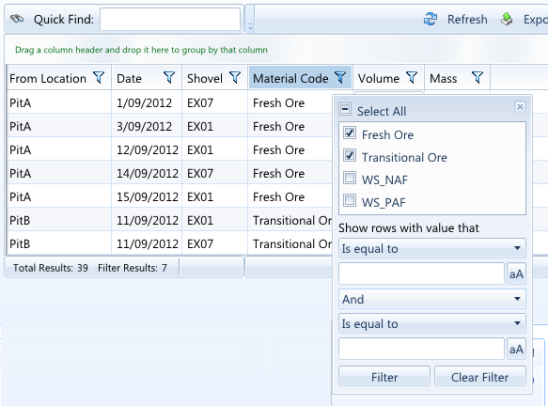
To remove the Filter, simply select the Clear Filter button or remove previously selected filter values.

To Group data simply drag a column heading to the Grouped by area above the headings row.
To remove the Grouping, simply drag the column heading from the Grouped by area back to the column heading area.
Note: Report queries will be automatically grouped by any groupings set within the query and the column heading(s) will be placed into the Grouped by area.
The records may be sorted into ascending or descending order by the values of the selected column. It is also possible to sort additional column values within the previously selected column values.
Click on any column heading to sort the records in ascending order by the column values. The background colour of the heading will be changed and a little triangle will appear above the column heading. Click on the column heading a second time to sort the records in descending order by the column values. Click on the Column heading a third time to remove any sorting.
After sorting the records by a column select another column whilst holding the Shift key to sort the records by the 2nd selected column within the 1st selected column.
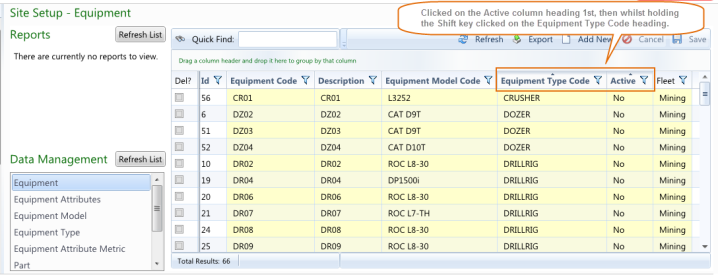
In the example above the equipment records are sorted by Equipment Type Code within the equipments Active status.

The Quick Find option can be used to quickly locate all records that contain the value that is being entered. Use the icon to clear the entered value.

It is possible to export the results in the following formats:
Note: Any filtering applied to the data grid will be reflected in the exported results.
Refer to the Data Management Queries topic under the Administration Menu for information on creating Data Management Query pages.